Prepper Search Engine

Prepper Search
Loading
Get This Search Engine

Monday, March 26, 2012

How to make a Homemade Fishing Spear

Find a long and straight stick. It is important to find a stick that has very few limbs and knots on it. Each knot and limb on the stick is a possible weak spot. The more weak spots on the stick, the higher the chances are that it will break. The ideal length for the stick is about 8 or 9 feet and about as thick as a mop handle. The best trees for making a fishing spear are saplings. Fire can be used to burn the limbs off of the stick.

Tamper the tip of the stick with fire. This will strengthen the wood (keeping it from wearing down) and allow for an extremely sharp point. Dip the tip into the fire and then rub it at an angle against a rock to sharpen it. This is effective if you do not have a knife.

Construct the hooks of the spear using a small branch. These hooks will keep the fish (or any other small animal) attached to the spear. Cut the branch so that you have a piece with two smaller branches on each side. Split the branch down the center so that you have two hooks. Each hook needs to be sharp, so carefully carve the ends. The sharper the better.

Make the rope for your spear. If you have any chord it can be used here. Otherwise you can use hide (deer hide or leather) or cloth. If are using hide or cloth cut the fabric into a circle. Then begin cutting around the circle (like a spiral). The rope should be about 1/4 inch thick.

Tie the hooks tightly onto the stick using the rope. Make sure you leave space between the hooks. You are now ready to start hunting! Aim well when you use the fishing spear because your hooks will not last forever.

How to make a Homemade Bow and Arrow

Cut a tree branch approximately 3 1/2 – 4 feet long. The branch should be at least 1 inch in diameter. Use the saw to remove any limbs from the branch. If desired, use the pocketknife to peel the bark from the branch. Hickory, Ash and Oak branches make the best bows.

Cut a triangular notch in each end of the branch. Cut a piece of string 1/2 foot shorter than the branch. Tie the end of the string around one end of the branch, run the string through the notch and pull tight to the other end of the branch. Tie the end of the string around the end. This completes the bow.

Cut smaller straight tree limbs. As on the bow, cut a triangular notch into one end.

Cut a double arrow shape out of cardboard or old roofing shingles. Wrap the arrow around the end of straight limb and tie securely with string. This completes the arrow.

Center the notch of the arrow on the string in the center of the bow. Pull back the string, while holding the arrow, and when you can pull back no farther, let the arrow fly.

Tuesday, March 20, 2012

Fishing with Milk Jugs

One of the ways I used to fish when I was younger, was with a milk jug,  It is very simple and very easy to catch fish, without having to sit there and hold a fishing pole.

Items needed:
1) fishing line
2) Milk Jugs with Cap
3) Fishing Weights
4) Hooks
5) bait

First cut around two and a half feet of fishing line.  Then tie off the fishing line to the handle of the milk jug.  At the bottom of the line add your weight and hook.  Now bait the hook, and toss the jug into the fishing hole.  Once the jug starts to bob up and down, you have a fish on.  Now how easy is that?

Monday, March 19, 2012

A Different Way To Make Fire

When I was a kid, growing up in Mississippi, I learned a lot of things about survival.  One lesson I learned, I never thought would come in handy.  A different way to make fire.  I always assumed that I would have access to matches or a lighter.  But it never hurts to learn new things. 

Did you know you can make a fire by using a soda can, and chocolate?  I know it sounds so far fetched, but it does work.  Here is a list of things you need.

1) a empty soda can
2) Chocolate
3) some type of cloth
4) One hour of your time.
5) The Sun

Take the soda can and flip it upside down, exposing the bottom of the can.  Now take a bit of Chocolate (dark Chocolate always seemed to work better) and smear it on the bottom of the can.  Now just like polishing a pair of shoes, take your cloth and polish the bottom of the can in small tight circular motions.  Continue this process  of adding Chocolate and polishing for about a hour.  The bottom of the can should look just like a mirror now.  Let the Sun beat down on it.  Hold a piece of paper or lent about a half an inch away from the edge of the can.  You do not want to hold the paper over the middle of the can, or it will not work.  This works just like a magnifying glass did when you were a kid.  The only difference is instead of the sun being concentrated through the glass on to the paper, it now reflects the suns heat off the can on to the paper igniting it in about a minute.  Try it.  I have heard that cleaning supplies work well also; like Ajax.  That using Ajax also takes less time to polish the bottom of the can.  But I have never tried this way.  Good Luck.  I hope you now know a different way to make a fire.


Friday, March 16, 2012

The New Family Member

This is a photo of the new Mossberg 12 Guage I bought last night.  If the SHTF and looters come to harm us, then our Bug out location will be like a roach motel, "They will walk in, but they won't walk out."

Here are the Stats

The Mossberg 535TK 12-Gauge 3.5" TACT FOS PTT is prepared to handle any of your survival needs without compromise.

Mossberg 535TK 12-Gauge 3.5" TACT FOS PTT, Realtree Hardwoods/HD Green:
  • Action: pump
  • Gauge: 12
  • Barrel length: 20"
  • Capacity: 4 plus 1
  • Chamber: 3-1/2"
  • Length: 38-1/2"
  • Weight: 7 lbs
  • Stock: synthetic
  • Finish: Realtree Hardwoods/HD Green

Never Forget

I came across this photo on the preppersnetwork.com website, under the state of Mississippi.  My home State.  This Photo was so powerful, that I had to add it.  Never Forget.  This photo should inspire everyone.  Anything can happen in this World we live in today.  Our comfortable lifestyle was shattered on 9/11.  It was America's wake up call.  Be prepared, America.  This Country is not immune from the evil endeavors of others.

Thursday, March 15, 2012

How to Clean and Cook a Squirrel

I found this on the Missouri Department of Conservation's website.  It is the simplest and best, that I have found.  This is the exact way my Grandfather taught me, when I was a  small boy.


Bushy-tails are just like other game—the meat on the table is only as good as the care taken in preparation.
Hair on cleaned game is a real turn-off to most people. You can avoid it when cleaning squirrels if they are soaked in water first. Just douse them in a bucket full of water or spray with a hose until the hide is soaking wet. This also works for rabbits.
The drawings below show how to proceed. After wetting them, pluck hair from the base of the tail as shown in step one. Hair removal makes it easier to do the next step.
Make a cut through the base of the tail bone as shown in step two, but not through the hide on the top of the rump. If you cut or pull the tail off you've got problems. Next, place the back legs on a board, stump or flat rock, place your foot on the squirrel's hind feet and cut toward the head about 1/2 to 1 inch, as shown in step three.
Then make a cut in front of each hind leg as shown in step four and pull up on the tail, peeling the hide toward the head until both front legs are exposed as shown in steps five and six. Swap ends with the squirrel, but avoid touching the flesh. Stand on the tail as shown in step seven and remove the hide from the back legs.
Next, pull the front legs through to the foot joint and cut the feet off. Remove one hind foot, then the head and the last hind foot.
Removal of entrails, steps eight and nine, involves a fair amount of blood, which is sticky. Saving this step for last prevents spreading hair over the skinned carcass.

Skinning a Squirrel

image of  squirrel being skinned
Step 1. Soak squirrel in water or spray and pluck hair from the base of the tail.
image of  squirrel being skinned
Step 2. Make a cut through base of tail bone; don't cut hide on top of rump.
image of  squirrel being skinned
Step 3. Place squirrel on board or stump and make small cut toward head.
image of  squirrel being skinned image of  squirrel being skinned
Step 4, 5. Cut skin in front of hind legs as shown.
image of  squirrel being skinned
Step 6. Peel hide toward head, exposing both front legs.
Step 6. Cont'd
image of  squirrel being skinned
Step 7. Stand on the tail and pull hide down to back feet. Pull the front legs through and cut front feet off, then hind feet and head.
image of  squirrel being skinned image of  squirrel being skinned
Steps 8 and 9. Make sure carcass is free of hair, then remove entrails and wash body cavity.
The last and finals step is the best—cooking and eating. Squirrels can be fried and served with biscuits and gravy, cooked and prepared with dumplings (a fine way to serve the older, tougher squirrels), or cooked, removed from the bone and prepared as squirrel pot pie, also a good way to prepare older squirrels.

Fried Squirrel

Frying squirrels is pretty simple. Just lay cut up pieces out on the counter top and sprinkle with salt, pepper and garlic powder on one or both sides, flour and fry in vegetable oil until golden brown.

Squirrel and Dumplings

Squirrel and dumplings takes a little more work. I usually season squirrels with salt, pepper, garlic and diced onion and pressure cook until the meat falls off the bone. Remove the meat from the bone and save the broth. I make dumplings (actually egg noodles) by using:
  • 1 egg
  • 1/2 cup water or cooled broth
  • 1 teaspoon salt
Mix ingredients with enough flour to make a firm dough. Turn out dough on a board and knead in flour until dough is stiff. Then roll out thin and leave for about one hour. Slice into either a diamond or noodle shape and drop into boiling broth.
Additional water may need to be added to the broth to handle the dumplings when all the dumplings have been added. Put squirrel meat in broth and simmer over low heat for at leas 15 to 20 minutes.

Squirrel Pot Pie

Squirrel pot pie can be made by boiling or pressure cooking squirrels seasoned the same as in dumplings. Remove from the bone. make pie crust from your favorite recipe and line a small to medium square cake pan. Mix squirrel meat with one can of corn, one can of peas, one medium diced onion and one cup of diced cooked potatoes and pour this filling on top of your crust. Cover top of filling with another crust. Punch holes in the top crust and cook until crust is golden brown. Then serve and enjoy.
7 Steps to Cleaning a Rabbit, If you are stuck away from Home or Camping

  1. Cut the skin on the rabbit's back thighs.
  2. Wear gloves. Using gloves, stick your fingers inside of the skin between it and the meat.
  3. Pull the skin until you come to the head of the dead rabbit.
  4. Cut the head off at the neck.
  5. Save the rabbit hide: If you plan to keep the skin, cut the skin at the neck and then cut off the head.
  6. Gut it when all the skin is off. Start at bottom of the chest and run your knife all the way down the bottom off its stomach.
  7. Get your knife inside it and scrap all of its guts out.
After the Rabbit is field dressed, You should wash out the meat.  Then cook it over an open flame.  You may also De-bone the meat; cutting the meat up into bite size pieces to add to a stew.  Rabbit meat is very high in protein and very low in fat.  Thus making it a great alternative food source.

Wednesday, March 14, 2012

Lights Go Out

Your short term Food Supply, is basically anything that you have in your Ice box, Freezer, and Pantry.  Back in October of 2011, the Northeast had a surprise snow storm.  Most of the people in New England were without power for several days up to two weeks in some areas.  My house was without power for one week.  Need less to say with no heat and no Lights this was a difficult time.  I was always told you learn from your mistakes.  Well my mistake was not being prepared.  Sure we had candles, and flash lights and extra blankets to cope, but what I never considered was my food supply.  The food we had in the fridge was fine for the first day.  On the Second day I was starting to get worried.  I moved a lot of the food from the freezer and fridge and covered them with snow on the back deck.  After day three it was becoming a big hassle to go outside into the snow and get the mayo out for a quick sandwich.  Then it hit me.   A light bulb went off in my head.  I gathered all the extra storage bottles we had on hand ( Empty two litter soda bottles. and Milk Jugs) cleaned them out and filled them up half way with water.  I then placed them outside and allowed them to freeze.  The meats and chicken from the freezer I left on the deck in the snow to remain frozen.  The fridge items I moved back into the fridge, along with the frozen water bottles.  The frozen water bottles worked like a charm keeping everything in the fridge nice and cool, until the power came back on.  Luckily for us the Power outage happened during the Winter, so freezing the water bottles were no problem..   If the Power would have went out for an extended period of time during any other part of the year,  It might have been a different story.  I would not have been able to freeze them and save my fridge items.   Now I keep Frozen water jugs in the deep freezer down stairs.  Just in case.   My short term food supply in the fridge will remain cool during any time of the year , and never again will I not be prepared for this type of situation.

Ideas for Barter, in case the SHTF


I came across this list somewhere so I wrote them down, and decided to share them here.  Although there are a lot of items here.  I personally would never ...ever give up Medician, Ammo, or Weapons to anyone.  These items,  I could use to save and protect my family.  I wouldn't recommend it.  Everything else sound like great ideas for a barter system.

Tobacco: If packed in an airtight containers can keep for a very long time.

Canned Meat: Spam, don’t laugh it stays good for a long time and it is great source of protein and fat.

Batteries: Alkaline and Lithium’s batteries will be hard to get items.

Synthetic Oil: Full synthetic oils have long shelf lives and numerous uses.

Antibiotics: Another great barter item worth huge exchange when your sick you’ll "make-a-deal"
.
Multi Vitamins: Often overlooked but in a survival situation this will be essential to maintaining good health from poor nutrition.

Seeds: Another great barter item especially if you live in a good growing climate.

Ammo: Shotgun (12 gauge & 20 gauge), 22LR, 9mm, .45 ACP, 5.56mm/.223, .270, .308 (Note: Even if you don’t own a .22, stocking 22LR ammo is a wise choice for barter because it is cheap and a lot of people own .22 Rifles)

Shampoo: A good barter luxury hygiene item that can double as soap.

Disposable Razors: People will like to be clean shaven.

Soap & Laundry Detergent: Good hygiene is important

Allergy medicine: You might not have them but a lot of people do.

Hard alcohol: It will keep for a long time and it also has a medicinal value as well. Wines will also last a long time. Beer, sorry not a good choice.

Aloe Vera: Good medical uses

Animal traps: An easy way to hunt without leaving your house.

Antacids - Heart burn may follow a bad diet

Antibiotics - Good medical uses

Anti-histamines - Good medical uses

Antiseptic - Good medical uses

Apple cider vinegar - Many uses

Aspirin - Good medical uses

Baby formula - Might be worth a lot to the right person

Can openers - Nothing worse than wasting half of the can of food trying to get it open

Candles - Beats sitting in the dark

Canned food - Easy to trade and always in demand

Coffee - Good coffee might be worth a lot to the right person

Cooking oil - Many uses

Fishing gear - Low stress way to gather food

Flashlights - As long as they come with batteries

Flour - Many cooking uses

Sea salt: See The Survival Mom’s article on this, good read.

Tea - Medical uses and worth a lot to tea drinkers

Toilet paper - like gold

Tools - if you have extras and can trade they will be valuable

Starting My Bug Out Bag


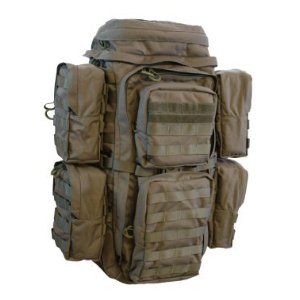
I am starting my first Bug Out Bag. I’ve packed  a bunch of times for camping trips, but I have never had a Bug Out Bag.  With the way things are in the World today,  being prepared is not an option, it is a must... for everyone.  I will actually be preparing three Bug Out Bags, for my Wife, my Son, and myself.

For myself, I am going with a military surplus ALICE Pack.   For my Son, I will be using  a smaller backpack, with a hydration system.   For my Wife, I will be using a larger hiking backpack, with a hydration system. 

Stuff in Our Bug Out Bags so far:

Water Proof Matches
Fire starter (Metal Strikers)
(10) Lighters
First Aid Kit  (204 pieces)
Emergency Blankets
Hand Held CB Radio
Short wave Walkie Talkies
Fixed Blade Knives
Folding Blade Knives
Throwing Knives
Tampons (to stop bleeding in wounds)
Candles
72 hour food ration for each bag
72 hour Water ration for each bag
Camping Hatchet
Handguns
Ammo
Bandanna
Flairs
Rope
Fishing supplies
(3) Duct Tape
Clothes for layering
Wool socks
Cold weather gloves
Cold Weather Hats
(2) Water Purifying Tablets
(3) 5 Gallon Collapsible water Buckets
Toilet Paper
Foot Powder
Tooth Brushes
Tooth Paste
Soap
Disinfecting Wipes
Money (Coins, Cash, and Silver Bars)
Flash Lights (Crank no Battery)
Radio (Crank no Battery)
Small Solar Powered Radio
Cooking Utensils (Pots, Plastic Plates, Spoons, Knives, Forks)
Leather mans (Utility Tools)
Compass
Whistles
Vaseline
Cotton Balls
Sleeping Bags
Tarps
Snake bite kit
Mirror


Things We still Need:

Medicine (antibiotics)
Multi Vitiams
Traps
Tent