At the rate we are going, life as we know it will end real soon. Prep and Prepare now, before it is to late.
This Blog is Dedicated to all the Preppers. If you have ideas or suggestions, Please feel free to add your comments. We are all learning. And we all should be learning from one another.
Friday, December 28, 2012
US Debt Clock
This is like the Energizer Bunny, IT JUST GOING AND GOING AND GOING !!!!!!!!
At the rate we are going, life as we know it will end real soon. Prep and Prepare now, before it is to late.
At the rate we are going, life as we know it will end real soon. Prep and Prepare now, before it is to late.
Thursday, November 22, 2012
Survival Myths
While researching survival myths, I came upon this web site. After reading alot of articles, this made the most sence to me. The web site link is
http://www.m4040.com/Survival/Survival_Myths.htm There is a lot of great information on this website.
FIRE MYTHS
Survival Matches - I see "waterproof survival matches" listed in more kits than I care to count, and I gotta say... terrible idea. While it may add a sense of drama to a movie when "Rambo" is down to his last couple matches, you don't need that kind of drama if you're in a life or death situation!
Survival Matches - I see "waterproof survival matches" listed in more kits than I care to count, and I gotta say... terrible idea. While it may add a sense of drama to a movie when "Rambo" is down to his last couple matches, you don't need that kind of drama if you're in a life or death situation!
The space and weight taken up in a kit or in your pocket by a dozen "survival" matches would be better filled with a small Bic lighter. A lighter will start a LOT more fires than those few matches. If you're worried about the lighter failing, then bring a magnesium fire starter. These are 100% waterproof, will light thousands of fires, and the magnesium burns a lot hotter than matches.
Flashlight Method - This is a method I've seen by which you can break the bulb of your flashlight, and then use the coil inside to light a fire. Simply put... give it a shot in your backyard and you'll find that it's great at destroying flashlights but terrible at actually starting fires! Recommendation... bring a lighter, and use your flashlight for... LIGHT!
Ice Lens Method - Can you start a fire with a lens that you fashion from ice? Probably not. Scientifically, it's possible, but in all practical sense, the odds are really slim to none. Seriously, give it a try in the comfort of your own backyard on a nice warm day. Feel free to let me know how well this works. Also, while you're wasting hours on this, imagine that you're also freezing to death in a snowy, icy environment. You'll quickly realize that this is a colossal waste of your time and energy, and you won't get a fire going. I guarantee you that. Recommendation... bring a lighter!
Soda & Candy Bar Method - This fire starting method is yet another fun science experiment, but in actual use, it's another colossal waste of time, at the end of which... you'll have no fire. If you're lounging in your backyard someday and suddenly decide that you'd like to piss away the entire afternoon on some fruitless endeavor, go ahead and give this a shot. However... in a real survival situation... eat the friggin' candy bar and be glad for it. Drink the friggin' soda and rejoice. Be glad for those precious calories, and then keep the can as a canteen and cooking vessel. Recommendation... bring a damn lighter!
SHELTER MYTHS
High Ground is Warmer - This is one survival tale that keeps popping up all over the place. We're told that when considering locations for a shelter, we should avoid valleys and low lying areas because cold settles there and it may be several degrees colder than higher ground. This is scientifically sound, but in actual practice... it's pure, unadulterated bullshit. This is because while a thermometer may show a few degrees difference between two elevations, thermometers are incapable of measuring wind chill factors.
In most cases, higher elevations are exposed to a lot more wind while small valleys and lower areas are sheltered from it. A thermometer may show that actual air temperature has increased 2 or 3 degrees by moving to higher ground, but the temperature as far as your body is concerned is likely to have dropped by 20 or 30 degrees. Wind will suck away your body heat faster than you can generate it. Today as I write this, it's almost 50 degrees and sunny outside... a seemingly nice March afternoon. However, today's wind chill factor drops that to somewhere between 20 and 30... and suddenly it's not so great!
Now consider what happens once you get a fire going. Most fires will quickly heat the surrounding area, but when you have some wind factored in, most of that heat is carried off. Also remember that a fire in the wind is going to consume about twice as much wood. You'll spend most of your time and energy finding firewood, and then get very little heat as a reward! Not a very good tradeoff. As such, one of your primary concerns is to find a place that's very sheltered from the wind and elements, and then build yourself a nice, warm fire to keep you warm!
Shelters Should Be Built From Dead Materials - This one came from our friends in the "green" survival movement. They are far more concerned that a few trees might get killed than they are about your life. All advice from them should be considered highly suspect. Imagine building your shelter as a big pile of dead leaves and wood. Now imagine having a campfire anywhere near that. Do you really want to climb in there and go to sleep? Nuff' said.
WATER MYTHS
Boil for 10 Minutes - This is one so old, I don't even know where it came from. I've also heard 5 minutes, 15 minutes and even 20 minutes of boiling time. All of these are bullshit. I'll keep this short... if the water reaches boiling point, it's safe to drink, period, end of story.
Divining Rods - This is another old wives tale. Use your common sense and you'll probably find water. Use a forked stick and "mystical psychic powers", and you may find yourself very dead. I've heard people claim that a divining rod is simply tapping into one's subconscious thoughts. I suppose if you're some sort of walking emotional wreck who keeps every shred of logic and common sense buried away in your subconscious... then sure... go ahead and wave your stick. Hold a seance while you're at it. Maybe the spirits will tell you where to find water.
The rest of us (sane folks) will simply think our way through the situation. Common sense says water runs downhill. If you walk downhill, you're pretty likely to find water. Birds and animal trails can also lead you to water... they need it as much as you do.
FOOD MYTHS
Plants Are a Good Source of Food in the Wilderness - Unless you're a certified expert not just in plants, but in the plants of the given region you happen to be in, stay the hell away from the plants!
Here's the facts...
- ALL fur bearing mammals are safe to eat, and will provide you with nutrients and calories.
- ALL 6 legged insects are safe to eat, and will provide you with nutrients and calories.
- Almost all freshwater fish and almost all birds are safe to eat, and will provide you with nutrients and calories.
...and finally
- MOST plants will harm you, make you sick, or worse... poison you. There are actually very few that will provide you with any nutrients or calories.
It's a simple equation... if it walks, crawls, swims, or flies, the odds are in your favor that it's not only safe to eat, but that it will provide you with the nutrition and energy your body needs. If it sits there like... umm... like a plant, the odds are against you both for your own physical safety, and for nutritional content. It's just not worth the gamble unless you're absolutely sure!
~Dakota Fire Pit~

If you are camping or stuck in the middle of the wilderness, a great way to stay warm with less wood is to make a Dakota fire pit. This is also a great way to have a fire and not give away your position, if you are in a hostile survival situation.
Steps
- Start by digging 2 holes about 9 inches in diameter about 9 inches away from each other. After you are about 12 inches down, connect the holes to create a tunnel with the top of the holes being the entrances.
- At this point, you should have a tunnel in the shape of a "U". At the bottom of one of the original tunnels, light a fire like you would a regular campfire.
Tips
- Even though you expend a lot of time and energy making this, it is definitely worth it. Its design combats heat loss into the air, giving you more warmth with less wood used. This way, you can focus on more important tasks than collecting and chopping firewood.
- Additionally, since the fire is in a pit, it throws less light. This makes it harder to see your fire from far away,which is invaluable in a hostile situation.
Warnings
- Always be careful, safe, and responsible with fire. And make sure to obey any fire bans or restrictions in your area.
Things You'll Need
- Wood
- Shovel / Some type of digging tool
- Tinder
- Ignition source (lighter, fire stick, matches, etc)
Sunday, November 18, 2012
New Russian Rifle

Just picked this up. Man does it kick. But it will also reach out and touch someone from a long way away.
Here are the stats:
Mosin-Nagant Infantry Rifle Model 1891, Russia. Caliber 7.62x54mmR.
| M1891 and M91/10 infantry rifle | M1891 and M91/10 Dragoon rifle | M1891/30 | M1891/38 | M1891/44 | |
| Caliber | 7.62x54mm R | ||||
| Action | manual operated, rotating bolt | ||||
| Overall length | 1306 mm 1738 mm with bayonet | 1234 mm 1666 mm with bayonet | 1234 mm 1666 mm with bayonet | 1020 mm | 1020 mm |
| Barrel length | 800 mm | 730 mm | 730 mm | 510 mm | 510 mm |
| Weight | 4.22 kg 4.6 kg with bayonet | 3.9 kg 4.28 kg with bayonet | 3.8 kg 4.18 kg with bayonet | 3.45 kg | ~3.9 kg with non-detachable bayonet |
| Magazine capacity | 5 rounds in integral magazine | ||||
The Mosin-Nagant rifle, known in the Russia as a "Vintovka Mosina" (Mosin Rifle), was developed under the government commission in the late 1880s and early 1890s, and was officially adopted for service by the Russian Tsar in 1891 as a "Trechlineynaja vintovka obraztsa 1891 goda" (three-line rifle, system 1891; three line means caliber of three lines; one line is an 0.1 inch, so it's an .30 inch, or 7.62mm). Along with the rifle, a new, small-caliber cartridge was adopted. This cartridge had a rimmed, bottlenecked case and a jacketed, blunt nose bullet. The rimmed case design, which at that time already started to became obsolescent, was inspired by the low level of the Russian arms industry, and also as intention to keep the price of the rifle as low as possible, since the rimmed case, which headspaces on rim, allows for much looser chamber dimensions, unlike the rimless ones, which required headspacing on the case shoulders, so chambers must be machined much more precisely (that means - on better machinery and for much money). This decision, while probably worked as a savings measure, caused a major PITA for Russian small arms designer, since for different purposes this obsolete, rimmed cartridge is kept in general service with Russian army for more than 110 years!
The history of the development of M1891 rifle is somewhat shady and controversial. During the official trials, two designs were selected for final - one by Russian army captain Mosin, and another, by the Belgian designer Nagant. Final design, adopted by the Commission, utilized features from both, and Leon Nagant was paid for his part for some very serious amount of money. Mosin received a rank promotion and worked on the Sestroretsk arsenal, trying to set this rifle for production. The exact amount of influence of each designer is still unclear for me, so at this moment I'll leave this for further research.
Sunday, November 4, 2012
New Home Defense Weapon

Yet another toy for the house. Man I hope no one wants to break in....no wait check that....I hope they do ! :)
Here are the specs:
Mossberg Tactical .22 semi-automatic rifle
.22 Long Rifle caliber
18" barrel
10 round capacity
Adjustable black synthetic stock
Quad rail forend
Integrated A2-style carry handle/rear sight/top rail
Front post and adjustable rear sights
33.25" to 37" overall length
10.75" to 14.5" length of pull
Weighs 5 pounds
Friday, November 2, 2012
Glock 40 CAL

Just got a new toy for the house. I really love the way this glock looks and feels. Guns don't kill people, people kill people (and this weapon will make this happen quickly.)
Here are the stats:
- Caliber: .40S&W (although Glock likes to leave off the "S&W" part)
- Overall Length: 7.32 inches
- Overall Height: 5.43 inches
- Overall Width: 1.18 inches
- Weight = 34 ounces (loaded)
- Barrel length = 4.5 inches
Monday, April 2, 2012
The Wife's new Toy
My wife is really starting to enjoy prepping. When I first started discussing prepping, she was a bit apprehensive. Now she is really starting to get into the swing of things. We bought her first hand gun the other day. It is a Ruger .380 LCP. It is the perfect size for her, and has incredible stopping power. Here are the stats below:

| Caliber: | .380 Auto |
| Capacity: | 6+1 |
| Length: | 5.16" |
| Width: | 0.82" |
| Height: | 3.60" |
| Barrel Material: | Alloy Steel |
| Barrel Finish | Blued |
| Slide Material | Alloy Steel |
| Slide Finish | Blued |
| Grip Frame | Black, High Performance, Glass-Filled Nylon |
Monday, March 26, 2012
How to make a Homemade Fishing Spear
Find a long and straight stick. It is important to find a stick that has very few limbs and knots on it. Each knot and limb on the stick is a possible weak spot. The more weak spots on the stick, the higher the chances are that it will break. The ideal length for the stick is about 8 or 9 feet and about as thick as a mop handle. The best trees for making a fishing spear are saplings. Fire can be used to burn the limbs off of the stick.
Tamper the tip of the stick with fire. This will strengthen the wood (keeping it from wearing down) and allow for an extremely sharp point. Dip the tip into the fire and then rub it at an angle against a rock to sharpen it. This is effective if you do not have a knife.
Construct the hooks of the spear using a small branch. These hooks will keep the fish (or any other small animal) attached to the spear. Cut the branch so that you have a piece with two smaller branches on each side. Split the branch down the center so that you have two hooks. Each hook needs to be sharp, so carefully carve the ends. The sharper the better.
Make the rope for your spear. If you have any chord it can be used here. Otherwise you can use hide (deer hide or leather) or cloth. If are using hide or cloth cut the fabric into a circle. Then begin cutting around the circle (like a spiral). The rope should be about 1/4 inch thick.
Tie the hooks tightly onto the stick using the rope. Make sure you leave space between the hooks. You are now ready to start hunting! Aim well when you use the fishing spear because your hooks will not last forever.


How to make a Homemade Bow and Arrow
Cut a tree branch approximately 3 1/2 – 4 feet long. The branch should be at least 1 inch in diameter. Use the saw to remove any limbs from the branch. If desired, use the pocketknife to peel the bark from the branch. Hickory, Ash and Oak branches make the best bows.
Cut a triangular notch in each end of the branch. Cut a piece of string 1/2 foot shorter than the branch. Tie the end of the string around one end of the branch, run the string through the notch and pull tight to the other end of the branch. Tie the end of the string around the end. This completes the bow.
Cut smaller straight tree limbs. As on the bow, cut a triangular notch into one end.
Cut a double arrow shape out of cardboard or old roofing shingles. Wrap the arrow around the end of straight limb and tie securely with string. This completes the arrow.
Center the notch of the arrow on the string in the center of the bow. Pull back the string, while holding the arrow, and when you can pull back no farther, let the arrow fly.

Tuesday, March 20, 2012
Fishing with Milk Jugs
One of the ways I used to fish when I was younger, was with a milk jug, It is very simple and very easy to catch fish, without having to sit there and hold a fishing pole.
Items needed:
1) fishing line
2) Milk Jugs with Cap
3) Fishing Weights
4) Hooks
5) bait
First cut around two and a half feet of fishing line. Then tie off the fishing line to the handle of the milk jug. At the bottom of the line add your weight and hook. Now bait the hook, and toss the jug into the fishing hole. Once the jug starts to bob up and down, you have a fish on. Now how easy is that?
Monday, March 19, 2012
A Different Way To Make Fire
When I was a kid, growing up in Mississippi, I learned a lot of things about survival. One lesson I learned, I never thought would come in handy. A different way to make fire. I always assumed that I would have access to matches or a lighter. But it never hurts to learn new things.
Did you know you can make a fire by using a soda can, and chocolate? I know it sounds so far fetched, but it does work. Here is a list of things you need.
1) a empty soda can
2) Chocolate
3) some type of cloth
4) One hour of your time.
5) The Sun
Take the soda can and flip it upside down, exposing the bottom of the can. Now take a bit of Chocolate (dark Chocolate always seemed to work better) and smear it on the bottom of the can. Now just like polishing a pair of shoes, take your cloth and polish the bottom of the can in small tight circular motions. Continue this process of adding Chocolate and polishing for about a hour. The bottom of the can should look just like a mirror now. Let the Sun beat down on it. Hold a piece of paper or lent about a half an inch away from the edge of the can. You do not want to hold the paper over the middle of the can, or it will not work. This works just like a magnifying glass did when you were a kid. The only difference is instead of the sun being concentrated through the glass on to the paper, it now reflects the suns heat off the can on to the paper igniting it in about a minute. Try it. I have heard that cleaning supplies work well also; like Ajax. That using Ajax also takes less time to polish the bottom of the can. But I have never tried this way. Good Luck. I hope you now know a different way to make a fire.

Friday, March 16, 2012
The New Family Member

Here are the Stats
The Mossberg 535TK 12-Gauge 3.5" TACT FOS PTT is prepared to handle any of your survival needs without compromise.
Mossberg 535TK 12-Gauge 3.5" TACT FOS PTT, Realtree Hardwoods/HD Green:
- Action: pump
- Gauge: 12
- Barrel length: 20"
- Capacity: 4 plus 1
- Chamber: 3-1/2"
- Length: 38-1/2"
- Weight: 7 lbs
- Stock: synthetic
- Finish: Realtree Hardwoods/HD Green
Never Forget

Thursday, March 15, 2012
How to Clean and Cook a Squirrel
I found this on the Missouri Department of Conservation's website. It is the simplest and best, that I have found. This is the exact way my Grandfather taught me, when I was a small boy.
Bushy-tails are just like other game—the meat on the table is only as good as the care taken in preparation.
Hair on cleaned game is a real turn-off to most people. You can avoid it when cleaning squirrels if they are soaked in water first. Just douse them in a bucket full of water or spray with a hose until the hide is soaking wet. This also works for rabbits.
The drawings below show how to proceed. After wetting them, pluck hair from the base of the tail as shown in step one. Hair removal makes it easier to do the next step.
Make a cut through the base of the tail bone as shown in step two, but not through the hide on the top of the rump. If you cut or pull the tail off you've got problems. Next, place the back legs on a board, stump or flat rock, place your foot on the squirrel's hind feet and cut toward the head about 1/2 to 1 inch, as shown in step three.
Then make a cut in front of each hind leg as shown in step four and pull up on the tail, peeling the hide toward the head until both front legs are exposed as shown in steps five and six. Swap ends with the squirrel, but avoid touching the flesh. Stand on the tail as shown in step seven and remove the hide from the back legs.
Next, pull the front legs through to the foot joint and cut the feet off. Remove one hind foot, then the head and the last hind foot.
Removal of entrails, steps eight and nine, involves a fair amount of blood, which is sticky. Saving this step for last prevents spreading hair over the skinned carcass.

Step 1. Soak squirrel in water or spray and pluck hair from the base of the tail.

Step 2. Make a cut through base of tail bone; don't cut hide on top of rump.

Step 3. Place squirrel on board or stump and make small cut toward head.


Step 4, 5. Cut skin in front of hind legs as shown.

Step 6. Peel hide toward head, exposing both front legs.
Step 6. Cont'd

Step 7. Stand on the tail and pull hide down to back feet. Pull the front legs through and cut front feet off, then hind feet and head.


Steps 8 and 9. Make sure carcass is free of hair, then remove entrails and wash body cavity.
The last and finals step is the best—cooking and eating. Squirrels can be fried and served with biscuits and gravy, cooked and prepared with dumplings (a fine way to serve the older, tougher squirrels), or cooked, removed from the bone and prepared as squirrel pot pie, also a good way to prepare older squirrels.
Additional water may need to be added to the broth to handle the dumplings when all the dumplings have been added. Put squirrel meat in broth and simmer over low heat for at leas 15 to 20 minutes.
Bushy-tails are just like other game—the meat on the table is only as good as the care taken in preparation.
Hair on cleaned game is a real turn-off to most people. You can avoid it when cleaning squirrels if they are soaked in water first. Just douse them in a bucket full of water or spray with a hose until the hide is soaking wet. This also works for rabbits.
The drawings below show how to proceed. After wetting them, pluck hair from the base of the tail as shown in step one. Hair removal makes it easier to do the next step.
Make a cut through the base of the tail bone as shown in step two, but not through the hide on the top of the rump. If you cut or pull the tail off you've got problems. Next, place the back legs on a board, stump or flat rock, place your foot on the squirrel's hind feet and cut toward the head about 1/2 to 1 inch, as shown in step three.
Then make a cut in front of each hind leg as shown in step four and pull up on the tail, peeling the hide toward the head until both front legs are exposed as shown in steps five and six. Swap ends with the squirrel, but avoid touching the flesh. Stand on the tail as shown in step seven and remove the hide from the back legs.
Next, pull the front legs through to the foot joint and cut the feet off. Remove one hind foot, then the head and the last hind foot.
Removal of entrails, steps eight and nine, involves a fair amount of blood, which is sticky. Saving this step for last prevents spreading hair over the skinned carcass.
Skinning a Squirrel
Step 1. Soak squirrel in water or spray and pluck hair from the base of the tail.
Step 2. Make a cut through base of tail bone; don't cut hide on top of rump.
Step 3. Place squirrel on board or stump and make small cut toward head.
Step 4, 5. Cut skin in front of hind legs as shown.
Step 6. Peel hide toward head, exposing both front legs.
Step 6. Cont'd
Step 7. Stand on the tail and pull hide down to back feet. Pull the front legs through and cut front feet off, then hind feet and head.
Steps 8 and 9. Make sure carcass is free of hair, then remove entrails and wash body cavity.
The last and finals step is the best—cooking and eating. Squirrels can be fried and served with biscuits and gravy, cooked and prepared with dumplings (a fine way to serve the older, tougher squirrels), or cooked, removed from the bone and prepared as squirrel pot pie, also a good way to prepare older squirrels.
Fried Squirrel
Frying squirrels is pretty simple. Just lay cut up pieces out on the counter top and sprinkle with salt, pepper and garlic powder on one or both sides, flour and fry in vegetable oil until golden brown.Squirrel and Dumplings
Squirrel and dumplings takes a little more work. I usually season squirrels with salt, pepper, garlic and diced onion and pressure cook until the meat falls off the bone. Remove the meat from the bone and save the broth. I make dumplings (actually egg noodles) by using:- 1 egg
- 1/2 cup water or cooled broth
- 1 teaspoon salt
Additional water may need to be added to the broth to handle the dumplings when all the dumplings have been added. Put squirrel meat in broth and simmer over low heat for at leas 15 to 20 minutes.
Squirrel Pot Pie
Squirrel pot pie can be made by boiling or pressure cooking squirrels seasoned the same as in dumplings. Remove from the bone. make pie crust from your favorite recipe and line a small to medium square cake pan. Mix squirrel meat with one can of corn, one can of peas, one medium diced onion and one cup of diced cooked potatoes and pour this filling on top of your crust. Cover top of filling with another crust. Punch holes in the top crust and cook until crust is golden brown. Then serve and enjoy.7 Steps to Cleaning a Rabbit, If you are stuck away from Home or Camping
- Cut the skin on the rabbit's back thighs.
- Wear gloves. Using gloves, stick your fingers inside of the skin between it and the meat.
- Pull the skin until you come to the head of the dead rabbit.
- Cut the head off at the neck.
- Save the rabbit hide: If you plan to keep the skin, cut the skin at the neck and then cut off the head.
- Gut it when all the skin is off. Start at bottom of the chest and run your knife all the way down the bottom off its stomach.
- Get your knife inside it and scrap all of its guts out.
After the Rabbit is field dressed, You should wash out the meat. Then cook it over an open flame. You may also De-bone the meat; cutting the meat up into bite size pieces to add to a stew. Rabbit meat is very high in protein and very low in fat. Thus making it a great alternative food source.


Wednesday, March 14, 2012
Lights Go Out
Your short term Food Supply, is basically anything that you have in your Ice box, Freezer, and Pantry. Back in October of 2011, the Northeast had a surprise snow storm. Most of the people in New England were without power for several days up to two weeks in some areas. My house was without power for one week. Need less to say with no heat and no Lights this was a difficult time. I was always told you learn from your mistakes. Well my mistake was not being prepared. Sure we had candles, and flash lights and extra blankets to cope, but what I never considered was my food supply. The food we had in the fridge was fine for the first day. On the Second day I was starting to get worried. I moved a lot of the food from the freezer and fridge and covered them with snow on the back deck. After day three it was becoming a big hassle to go outside into the snow and get the mayo out for a quick sandwich. Then it hit me. A light bulb went off in my head. I gathered all the extra storage bottles we had on hand ( Empty two litter soda bottles. and Milk Jugs) cleaned them out and filled them up half way with water. I then placed them outside and allowed them to freeze. The meats and chicken from the freezer I left on the deck in the snow to remain frozen. The fridge items I moved back into the fridge, along with the frozen water bottles. The frozen water bottles worked like a charm keeping everything in the fridge nice and cool, until the power came back on. Luckily for us the Power outage happened during the Winter, so freezing the water bottles were no problem.. If the Power would have went out for an extended period of time during any other part of the year, It might have been a different story. I would not have been able to freeze them and save my fridge items. Now I keep Frozen water jugs in the deep freezer down stairs. Just in case. My short term food supply in the fridge will remain cool during any time of the year , and never again will I not be prepared for this type of situation.


Ideas for Barter, in case the SHTF

I came across this list somewhere so I wrote them down, and decided to share them here. Although there are a lot of items here. I personally would never ...ever give up Medician, Ammo, or Weapons to anyone. These items, I could use to save and protect my family. I wouldn't recommend it. Everything else sound like great ideas for a barter system.
Tobacco: If packed in an airtight containers can keep for a very long time.
Canned Meat: Spam, don’t laugh it stays good for a long time and it is great source of protein and fat.
Batteries: Alkaline and Lithium’s batteries will be hard to get items.
Synthetic Oil: Full synthetic oils have long shelf lives and numerous uses.
Antibiotics: Another great barter item worth huge exchange when your sick you’ll "make-a-deal"
.
Multi Vitamins: Often overlooked but in a survival situation this will be essential to maintaining good health from poor nutrition.
Seeds: Another great barter item especially if you live in a good growing climate.
Ammo: Shotgun (12 gauge & 20 gauge), 22LR, 9mm, .45 ACP, 5.56mm/.223, .270, .308 (Note: Even if you don’t own a .22, stocking 22LR ammo is a wise choice for barter because it is cheap and a lot of people own .22 Rifles)
Shampoo: A good barter luxury hygiene item that can double as soap.
Disposable Razors: People will like to be clean shaven.
Soap & Laundry Detergent: Good hygiene is important
Allergy medicine: You might not have them but a lot of people do.
Hard alcohol: It will keep for a long time and it also has a medicinal value as well. Wines will also last a long time. Beer, sorry not a good choice.
Aloe Vera: Good medical uses
Animal traps: An easy way to hunt without leaving your house.
Antacids - Heart burn may follow a bad diet
Antibiotics - Good medical uses
Anti-histamines - Good medical uses
Antiseptic - Good medical uses
Apple cider vinegar - Many uses
Aspirin - Good medical uses
Baby formula - Might be worth a lot to the right person
Can openers - Nothing worse than wasting half of the can of food trying to get it open
Candles - Beats sitting in the dark
Canned food - Easy to trade and always in demand
Coffee - Good coffee might be worth a lot to the right person
Cooking oil - Many uses
Fishing gear - Low stress way to gather food
Flashlights - As long as they come with batteries
Flour - Many cooking uses
Sea salt: See The Survival Mom’s article on this, good read.
Tea - Medical uses and worth a lot to tea drinkers
Toilet paper - like gold
Tools - if you have extras and can trade they will be valuable
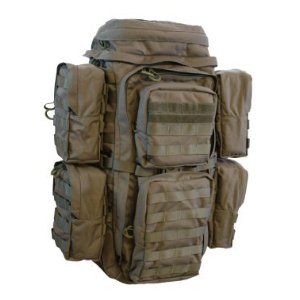
Starting My Bug Out Bag

I am starting my first Bug Out Bag. I’ve packed a bunch of times for camping trips, but I have never had a Bug Out Bag. With the way things are in the World today, being prepared is not an option, it is a must... for everyone. I will actually be preparing three Bug Out Bags, for my Wife, my Son, and myself.
For myself, I am going with a military surplus ALICE Pack. For my Son, I will be using a smaller backpack, with a hydration system. For my Wife, I will be using a larger hiking backpack, with a hydration system.
Stuff in Our Bug Out Bags so far:
Water Proof Matches
Fire starter (Metal Strikers)
(10) Lighters
First Aid Kit (204 pieces)
Emergency Blankets
Hand Held CB Radio
Short wave Walkie Talkies
Fixed Blade Knives
Folding Blade Knives
Throwing Knives
Tampons (to stop bleeding in wounds)
Candles
72 hour food ration for each bag
72 hour Water ration for each bag
Camping Hatchet
Handguns
Ammo
Bandanna
Flairs
Rope
Fishing supplies
(3) Duct Tape
Clothes for layering
Wool socks
Cold weather gloves
Cold Weather Hats
(2) Water Purifying Tablets
(3) 5 Gallon Collapsible water Buckets
Toilet Paper
Foot Powder
Tooth Brushes
Tooth Paste
Soap
Disinfecting Wipes
Money (Coins, Cash, and Silver Bars)
Flash Lights (Crank no Battery)
Radio (Crank no Battery)
Small Solar Powered Radio
Cooking Utensils (Pots, Plastic Plates, Spoons, Knives, Forks)
Leather mans (Utility Tools)
Compass
Whistles
Vaseline
Cotton Balls
Sleeping Bags
Tarps
Snake bite kit
Mirror
Things We still Need:
Medicine (antibiotics)
Multi Vitiams
Traps
Tent
Subscribe to:
Posts (Atom)